Showing posts with label world cuisines. Show all posts

Sunday, February 26, 2012

Cranberry-Walnut Brownies- Alex's 3 Month Celebration :)/Żurawinowo-Orzechowe Brownies na 3 Miesiące Alexa

Time flies, Alex is growing-up very fast :) Yesterday he turned 3 months. I realized that I had published only one post in last 3 months. But being a first time mom is not easy. It is like a small revolution. Your world turns upside down. From a well organized person, I turned to be a person who is always late or doesn't have time for anything. Now Alex is all my world, he sets the rules. But day by day we are more efficient, hehe so there is hope for me that in some times I'll be able to perform better :)

To celebrate my Little Prince Alexander's 3 months with his Grandma and Grandpa I made delicious Cranberry-Walnut Brownies.
I modified Jamie's Oliver "Fifteen chocolate brownies" and the result came out simply great.

Here comes the recipe:

  • 250g of unsalted butter
  • 200g of good quality 70% dark chocolate
  • 80g of cocoa powder
  • 65g of plain flour
  • 1 teaspoon of baking powder
  • 350g of caster sugar
  • 4 large eggs
  • 150g of broken walnuts
  • 150g of dried cranberries
Preheat the oven to 180C. Line a rectangular baking tray with baking paper (size approx. 30cm). Break the chocolate into pieces, melt it in a bowl over some simmering water. Melt the butter in a small cooking pot, combine with chocolate and mix well. Add cranberries and nuts and stir together.
In a separate bowl mix together the sifted cocoa powder, sifted flour, baking powder and sugar. Then add this to the chocolate, cranberries and walnuts mix part by part mixing well together. Beat the eggs by a fork and mix in  until everything is well combined.

Pour the batter into the baking tray, place in the oven for approx. 25minutes. Be careful not to overcook the brownies. Don't check with the skewer if it is well baked. This trick doesn't work with brownies.
Brownies should be slightly springy on the outside but gooey in the middle.
Allow your brownies to cool down well. Don't be tempted to cut it before it cools down as it will start braking. Once it is cold transfer your brownies to a large chopping board and cut into squares. 
Now if you want to serve it hot you can heat it up for 30sec in microwave.

Enjoy!!!
-------------------------------------------------------------------------------------------------------------
Jak ten czas leci. Aluś wczoraj skończył 3 miesiące. Właśnie zdałam sobie sprawę, że w przeciągu tych 3 miesięcy udało mi się napisać jedynie jednego posta. No ale tak to już bywa jak się zostaje mamą po raz pierwszy w życiu :) To jak mała życiowa rewolucja. Wszystko wywraca się do góry nogami. Z osoby dobrze zorganizowanej, a przynajmniej za taką się uważałam, stałam się osobą, której wiecznie brakuje czasu. 
No tak, ale teraz Aluś jest całym moim światem i to on ustala reguły, nie zapominając o jego Tacie rzecz jasna ;) Niemniej jednak z dnia na dzień radzimy sobie coraz lepiej, więc jest i dla mnie nadzieja ;)

Aby uczcić wraz z Babcią i Dziadkiem 3 miesiące małego księcia Alexandra upiekłam pyszne żurawinowo-orzechowe brownies z przepisu Jamiego Olivera.

Polecam!!!

Składniki:
  • 250g masła
  • 2 tabliczki czekolady gorzkiej 70%
  • 80g kakao gorzkiego
  • 350g cukru
  • 65g mąki
  • 4 jajka
  • 1 łyżeczka proszku do pieczenia
  • 150g orzechów włoskich150g suszonych żurawin
Czekoladę połamać, rozpuścić w kąpieli wodnej. Masło roztopić, wymieszać ze stopioną czekoladą. Wymieszać z orzechami i żurawinami.
Do miski przesiać kakao i mąkę. Dodać proszek do pieczenia i cukier, dokładnie wymieszać. Powoli wsypywać do czekolady i masła stale mieszając. Na koniec dodać roztrzepane jajka i wszystko dokładnie wymieszać.
Piec 25min w 180C. Po tym czasie patyczek będzie mokry, ale to o to w brownies chodzi. 
Po upieczeniu pozwolić ciastu wystygnąć w foremce, następnie przełożyć na dużą deskę i pokroić na kwadraty. Postaraj się nie dać się skusić zanim brownies wystygną. Cisto nieco łamie się i rozpada podczas próby krojenia na ciepło tak więc pozwól mu dobrze wystygnąć, a następnie jeśli lubisz brownies na ciepło, podgrzej w mikrofalówce przez 30sekund bezpośrednio przed podaniem.

Smacznego!!!

 Here comes my little hero :) / A oto mój mały bohater :)


Tuesday, November 8, 2011

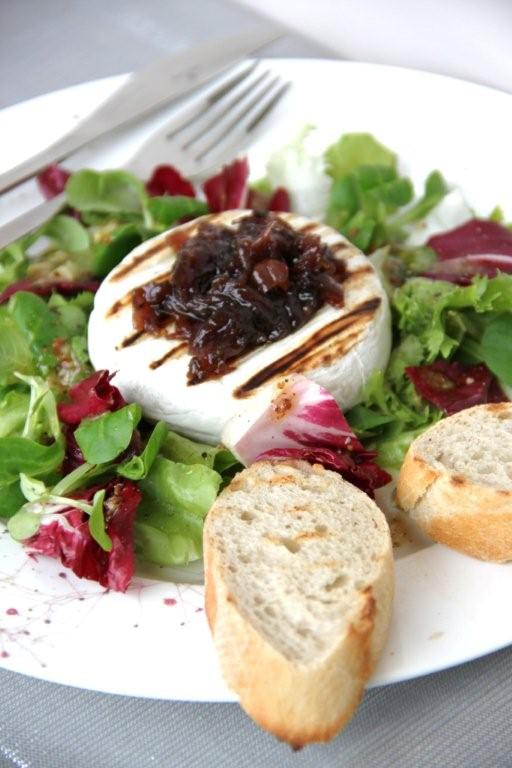
Grilled Camembert served on the bed of salad with vinaigrette sauce and onion preserves / Grillowany Camembert na łożu z sałaty z sosem vinaigrette i konfiturami z cebuli

Very fast, easy and elegant starter. I am sure everybody would be delighted to be served such dish.
  • 1 ring of Camembert cheese per person;
  • mix of different salads like: iceberg, corn salad, frisee and radicchio;
  • onion preserves - here you can find the recipe;
  • fresh grounded black pepper;
  • few slices of fresh baguette or ciabatta bread.
For vinaigrette sauce:
  • 3 parts of extra vergine olive oil;
  • 1 part of white wine vinegar;
  • 1 tea spoon of Dijon mustard or French mustard with full mustard seeds;
  • 1/3 tea spoon of honey;
  • pinch of salt;
  • 1 clove of garlic, pressed;
  • fresh grounded black pepper.
Combine all ingredients of the sauce by whisking them with a fork. 
On each plate place a portion of salad for one person, sprinkle with some sauce.
Heat up the grill pan. When it will be very hot, put Camembert cheese and slices of bread and grill on a medium flame for about 5-7 minutes each side. Once ready, place your cheese on the salad, season with fresh grounded black pepper and apply a portion of onion preserves from top. Serve with toasted slices of bread. Tastes great with a glass of white wine, but unfortunately I still have to wait few months to experience this pleasure ;)

Bon Appetit!!!
------------------------------------------------------------------------------------------------------------
Bardzo prosta, szybka i elegancka przystawka. Jestem pewna, że każdy były zachwycono, gdyby zaserwowano mu to właśnie danie.
  • 1 krążek sera Camembert na osobę;
  • mieszanka różnych sałat np: lodowej, roszponki, frisee oraz cykorii radicchio;
  • konfitury cebulowe - przepis znajdziesz  tutaj;
  • świeżo mielony czarny pieprz;
  • kilka kawałków świeżej bagietki lub ciabatty.
Na sos vinaigrette:
  • 3 części oliwy z oliwek extra vergine;
  • 1 część octu z białego wina;
  • 1 łyżeczka musztardy Dijon lub musztardy francuskiej z całymi ziarnami gorczycy;
  • 1/3 łyżeczki miodu;
  • szczypta soli;
  • 1 ząbek czosnku, zgnieciony;
  • świeżo mielony czarny pieprz.
Składniki sosu połączyć ze sobą ubijając widelcem.
Na każdym talerzu ułożyć porcję sałaty dla jednej osoby. Spryskać sosem. Rozgrzać patelnię grillową. Gdy będzie już bardzo gorąca umieścić na niej sery oraz kromki pieczywa. Grillować na średnim ogniu po około 5-7 minut z każdej ze stron. Kiedy ser będzie gotowy, ułożyć go na łożu sałaty, posypać świeżo zmielonym pieprzem, udekorować kleksem konfitury z cebuli. Podawać z podpieczonym pieczywem. Smakuje wybornie z lampką białego wina, jednak mnie na tę przyjemność przyjdzie jeszcze zaczekać co najmniej kilka miesięcy ;)

Smacznego!!!


Onion preserves with beer and thyme/Piwna konfitura cebulowa z tymiankiem

Today I would like to share a recipe for my last culinary discovery - Onion preserves with beer and thyme. I had a chance to taste it in one of Italian restaurants and I have fallen in love with this taste. I always wanted to replicate this taste and finally I succeeded.
This kind of preserve is very delicious, elegant and exquisite. It should be consumed as an antipasti together with Italian cheeses, served on a slice of ciabatta, or as an addition to main course, like grilled meat, for example. This was mu debut with preserves, which my Mom is famous for. But I am very happy with the result. I strongly recommend.

Ingredients for approx. 500ml jar or ready preserve:
  • 500g of red onions;
  • 50 ml of  extra vergine olive oil;
  • 75 ml of apple vinegar;
  • 1 small (330ml) can of lager beer;
  • 80 grams of brown sugar;
  • 1 tablespoon of thyme;
  • salt and pepper to taste.
Peal the onions and chop them into "feathers". Heat the oil in the saucepan and add chopped onions, let them simmer over medium heat for about 15 minutes. Remember to stir them quite often, will be more transparent. Add the vinegar and let it evaporate well,after that add the beer, sugar, thyme, salt and pepper. Bring to a boil, leave on low heat and cook for about 15-30 minutes or until the onions are soft and the liquid has evaporated. The consistency should be very syrupy, like a jam. Hot pot in a sterile jar. Once opened,  should be kept in the fridge.
--------------------------------------------------------------------------------------------------------------- 
Dziś chciałabym się podzielić moim nowym odkryciem - Konfiturą z czerwonej cebuli z dodatkiem piwa i tymianku. Miałam przyjemność jeść kiedyś taką konfiturę we włoskiej restauracji. Była przepyszna i  odkąd jej spróbowałam zawsze chciałam odtworzyć ten smak.
Konfitura jest bardzo wykwintna i elegancka. Doskonale nadaje się zarówno na przystawkę, np. jako dodatek do serów, podana na kawałeczku bagietki lub ciabatty, jak również jako dodatek do dań głównych np. do mięsa. Jest to mój debiut jeśli chodzi o konfitury i przetwory domowe, z których słynie moja Mama.
Muszę jednak przyznać, że wyszło przepysznie i na najwyższym poziomie. Polecam!!!

 Co potrzebujemy?

Składniki na ok. 500ml słoik gotowej konfitury:
  • 500g czerwonej cebuli;
  • 50 ml oliwy z oliwek extra vergine;
  • 75ml octu jabłkowego;
  • mała puszka jasnego piwa (330ml);
  • 80g brązowego cukru;
  • 1 łyżka suszonego tymianku;
  • sól i pieprz do smaku.
Cebule obrać, pokroić w piórka. W garnku o grubym dnie rozgrzać oliwę, dodać cebulę i smażyć przez około 15 minut często mieszając aż się zeszkli. Następnie dodać ocet jabłkowy i pozwolić mu odparować. Kolejno dodać cukier, tymianek oraz piwo. Wszystko dokładnie wymieszać, doprawić solą i pieprzem. Redukować na wolnym ogniu do momentu, aż konsystencja stanie się dość gęsta i konfiturowa (około 30 minut). Przełożyć do czystego słoiczka, zamknąć na gorąco. Po otwarciu przechowywać w lodówce.


Source/ Źródło: http://crumpetsandco.wordpress.com/2010/10/11/confit-di-cipolle-di-tropea-alla-birra-e-timo/

Monday, November 7, 2011

Tarte Tatin / Tarta Tatin

Tarte Tatin, an upside-down tart is one of my favourite desserts. Always yummy, very attractive, fast and extremely easy. There are few stories associated with this dessert, making it all time world famous classic.
 
Tradition says that the Tarte Tatin was first created by accident at the Hotel Tatin in Lamotte-Beuvron, France in 1898. 

The hotel was run by two sisters, Caroline and Stéphanie Tatin.

There are conflicting stories concerning the tart's origin, but the predominant one is that Stéphanie Tatin, who did most of the cooking, was overworked one day. She started to make a traditional apple pie, but left the apples cooking in butter and sugar for too long. Smelling the burning, she tried to rescue the dish by putting the pastry base on top of the pan of apples, quickly finishing the cooking by putting the whole pan in the oven. After turning out the upside down tart, she was surprised to find how much the hotel guests appreciated the dessert. 
In an alternative version of the tart's origin, Stéphanie baked a caramelized apple tart upside-down by mistake. Regardless she served her guests the unusual dish hot from the oven and a classic was born.
The Tarte becamea signature at the Hotel Tatin and the recipe spread through the Sologne region. Its lasting fame is probably due to the restaurateur Louis Vaudable, who tasted the tart on a visit to Sologne and made the dessert a permanent fixture on the menu at his restaurant Maxim's Paris.


Recipe is extremely easy:
  • 1 packet of ready made french pastry;
  • 1kg of sour apples;
  • 1 spoon of butter;
  • little bit of cinnamon powder;
  • caster sugar.
Peal the apples and cut it into sixes. Cover the bottom of a medium sized flat pan (hand less or with an oven safe handle) with a thin layer of caster sugar. Put it on a low flame and wait for the sugar to dissolve and caramelize. Once it is golden brown in colour stir in 1 spoon of butter. Put the apples one piece next to each other forming rings, until full form is covered by apples. Sprinkle some cinnamon powder. Cover the pan with the sheet of french pastry, form the edge and poke the pastry all over using a fork. Put in a preheated oven to 200C and bake until the pastry is golden in colour approx. 30minutes. Remove from the oven, cover with a big plate and turn upside down.
Your cake is ready :) Cut into pieces and serve hot. Tastes best with scoop of vanilla ice cream. 

Bon Appetit!
----------------------------------------------------------------------------------------------------------
Tarta Tatin,  pieczona "do góry nogami" to zdecydowanie jeden z moich ulubionych deserów. Zawsze pyszna, zawsze łatwa i efektowna, no i na dodatek mega szybka w przygotowaniu.
Z genezą tego deseru związanych jest kilka ciekawych historii. Generalnie chodzi o to, że tarta ta powstała przypadkiem w 1898 r. we Francji w hotelu Tatin. Hotel był wówczas prowadzony przez dwie siostry, Caroline oraz Stéphanie Tatin.

Teorie są dwie. Dominuje ta, w której odpowiedzialna za kuchnię Stéphanie Tatin, zaczęła przygotowywać klasyczny placek z jabłkami. Jako, że tego dnia była bardzo zmęczona, zostawiła jabłka z karmelem zbyt długo na ogniu. Czując, że coś zaczyna się przypalać, chciała uratować deser i w związku z tym nakryła patelnię ciastem i wstawiła ją do piekarnika. Po upieczeniu i przewróceniu tarty okazało się, że ciasto wyglądało bardzo ciekawie. Stéphanie zaserwowała je gościom na gorąco. Owy "niewypał" został bardzo entuzjastycznie odebrany przez gości.
W innej wersji mówi się, że Stéphanie  upiekła tartę "do góry nogami" przez pomyłkę. Bez względu na to jak było na prawdę, w ten oto sposób narodził się jeden z najbardziej klasycznych  deserów na świecie. Tarta Tatin stała się popisowym daniem hotelu Tatin, zaś przepis rozprzestrzenił się w całym regionie Sologne.
Podobno jednak do nadania deserowi światowej sławy przyczynił się restaurator Louis Vaudable,  który po wizycie w Sologne i po wypróbowaniu ciasta wprowadził je na stałe do menu swojej restauracji  Maxim's Paris.

Przepis jest niezwykle łatwy:
  • 1 opakowanie gotowego ciasta francuskiego;
  • 1kg kwaśnych jabłek (najlepiej Szara Reneta)
  • 1 łyżka masła;
  • odrobina cynamonu;
  • drobny cukier.
Jabłka obrać ze skórki, pokroić na szóstki. Dno patelni z odpinaną rączką, lub z rączką którą można bezpiecznie wstawić do piekarnika pokryć cienką warstwą cukru. Postawić na gazie i na małym ogniu podgrzewać do momentu, aż cukier się rozpuści i nabierze złocistej barwy. Następnie wmieszać łyżkę masła i dokładnie rozprowadzić. Jabłka układać na karmelu, koncentrycznie do momentu, aż zapełni się całą patelnię. Posypać cynamonem, przykryć płatem ciasta francuskiego, uformować, nakłuć i wstawić do piekarnika rozgrzanego do 200C. Zapiekać przez około 30 minut, aż ciasto będzie złociste. Po upieczeniu, wyjąć patelnię z piekarnika, nakryć talerzem i odwrócić. Gotowe.
Pokroić na kawałki, serwować na gorąco. Najlepiej smakuje z gałką lodów waniliowych.
Smacznego!!!


Źródło/ Source: http://en.wikipedia.org, http://web.archive.org/web/20021204075510/http://www.tarte-tatin.com/index.html

Monday, October 31, 2011

Pizza rustica con prosciutto di Parma,spinaci e gorgonzola/Pizza rustykalna z szynką parmeńską, szpinakiem i gorgonzolą

I guess every body likes pizza, at least I don't know anybody who doesn't. Lately I have prepared a home made rustic pizza with spinach and Gorgonzola cheese. To make the taste even more interesting I topped it with walnuts and some aromatic olive oil.


I usually bake my pizza on a  special stone. It imitates the wood fired oven and gives nice flavour to a pizza which is being baked in a normal electrical one. My stone is already few years old. I bought it in Duka. Looking at it I must say that it doesn't look to good, as it has become black with time. All the toppings that have fallen on it, got burnt and caused that it got dirty. But this is a "special dirt" as it gives flavour and aroma of the burnt wood to the crust.

For two pizzas on a thin crust:

Dough:
  • approx. 200g of plain flour; 
  • approx. 180 ml of water;
  • 15 g of fresh yeast or 1 spoon of instant yeast;
  • 1-2 spoons of olive oil;
  • 1 tea spoon of sugar;
  • big pinch of salt.
Tomato sauce:
  • 2 big ripe tomatoes;
  • 1 onion;
  • 2 gloves of garlic;
  • salt to taste;
  • fresh grounded black pepper to taste;
  • touch of sugar to taste;
  • fresh or dried herbs (oregano and basil);
  • 2 spoons of olive oil;
  • optionally balsamic vinegar to taste.
Heat the olive oil in a sauce pan, add chopped onion and pressed garlic, fry until golden in colour. 
Peal tomatoes and chop them, add to the onion. Saute until soft and they start breaking. Season with salt, pepper, herbs and sugar to taste. Mix well and saute until a sauce is formed. Press the sauce through the sieve to obtain very smooth consistency. Transfer back to the sauce pan and reduce till the proper consistency. You can season it also with a bit of balsamic vinegar. Keep aside, let it cool down.

Topping:
  • bunch of fresh spinach leaves (preferably baby spinach);
  • 100g of  prosciutto di Parma (Parma ham);
  • 100g of Gorgonzola;
  • big fist of walnuts;
  • flavoured olive oil (garlic, of peperoncino);
  • optionally favourite herbs.
Method:
Put the yeast in a medium size mixing bowl, add sugar to it, pour warm, but not very hot water, mix well together, preferably by hand, braking all lumps of yeast between your fingers. Sprinkle some flour form top and cover with a clean kitchen towel.  After approx. 20 minutes you should be able to observe that the yeast started working.
In a big mixing bowl sieve the flour, add pinch of salt, pour in the yeast solution and add olive oil.  Mix everything together and knead a smooth dough. If the dough is too sticky, add some more flour ,till the time you see that it kneads easily and doesn't stick to you hands. Knead for approx. 15 minutes.
After that cover it with a kitchen towel and let it rest and raise for about 30 minutes. 
While your dough is rising preheat the stone in the oven.
Wash the spinach and saute it on a frying pan with a little bit of olive oil  till the time it softens.
Divide your dough into two parts, stretch it or roll it till the time is it few millimeter in thickness. Remove the stone form the oven, but be careful not to burn yourself as it is very hot. Put it on a metal mesh, cover it with pizza dough, form the thicker edge and apply the topping.
First spread half of the tomato sauce on your dough, apply half of spinach leaves, few slices of Parma ham. Break some Gorgonzola between your fingers and sprinkle form top. Garnish with walnuts and herbs of your choice.
Bake for approx. 20 minutes in 200-220C, before serving sprinkle some aromatic olive oil form top and cut into 6-8 slices.
Buon Appetito!!! Viva la pizza :)
------------------------------------------------------------------------------------------------------------
Wydaje mi się, że nie znam osoby, która nie lubi pizzy. Tak więc dziś będzie pizzowo.
Ostatnio przygotowałam rustykalną pizzę ze szpinakiem, szynką parmeńską i serem gorgonzolą. Żeby dodatkowo uatrakcyjnić smak dodałam włoskie orzechy i smakową oliwkę.

Zazwyczaj piekę swoją pizzę na specjalnym kamieniu, który imituje piec opalany drewnem. Mój kamień jest już dość stary i nie wygląda zbyt ciekawie, aczkolwiek doskonale poprawia smak pizzy i nadaje jej cudowną chrupkość. Kupiłam go kilka lat temu w Duka. Z tego co wiem ciągle mają je w sprzedaży, więc jeśli ktoś jest chętny to polecam.

Składniki na dwie pizze na cienkim spodzie:

Ciasto:
  • około 200g mąki; 
  • około 180 ml ciepłej wody;
  • 15 g świeżych drożdży  lub 1 łyżeczka drożdży instant;
  • 1-2 łyżki oliwy z oliwek;
  • 1 łyżeczka cukru;
  • duża szczypta soli.
Sos pomidorowy:
  • 2 duże, dojrzałe pomidory;
  • 1 cebula;
  • 2 ząbki czosnku;
  • sól do smaku;
  • świeżo mielony czarny pieprz;
  • odrobina cukru do smaku;
  • świeże lub suszone zioła (oregano lub bazylia);
  • 2 łyżki oliwy z oliwek;
  • dodatkowo ocet balsamiczny do smaku.
W garnuszku rozgrzać oliwę, dodać posiekaną cebulę i czosnek przeciśnięty przez praskę, smażyć aż będą złociste. Obrać pomidory, pokroić je w kosteczkę dodać do cebuli i czosnku. Dusić aż zaczną się rozpadać. Doprawić solą, pieprzem, cukrem i ziołami. Dobrze wymieszać i dusić do momentu aż utworzy się sos. Przetrzeć go przez sito, a następnie redukować do momentu uzyskania właściwej konsystencji. Można dosmaczyć odrobiną octu balsamicznego. Zdjąć z gazu i wystudzić.
Dodatki:
  • pęczek świeżego szpinaku (najlepiej typu baby - młode małe liście);
  • 100g prosciutto di Parma (szynki parmeńskiej);
  • 100g sera Gorgonzola;
  • duża garść orzechów włoskich;
  • smakowa oliwka (np. czosnkowa lub peperoncino);
  • dodatkowo ulubione zioła.
Sposób przygotowania:
Drożdże umieścić w średniej wielkości miseczce, zasypać cukrem, zalać ciepłą ale nie gorącą wodą. Rozetrzeć między palcami i zamieszać. Posypać odrobiną mąki, przykryć czystą ściereczką. Odstawić na 20 minut. W tym czasie powinny zacząć pracować.
Do dużej miski przesiać mąkę, dodać sól, przelać rozczyn oraz dodać oliwę. Zamieszać drewnianą łyżką, a następnie zagniatać do momentu uzyskania gładkiego elastycznego ciasta. Każda mąka inaczej wchłania wodę, może się więc okazać, że trzeba będzie dosypać nieco mąki, tak by ciasto przestało kleić się do dłoni. Wyrabiać około 15 minut. Następnie przykryć ściereczką i odstawić na około 30 minut.
W czasie kiedy ciasto wyrasta, wsadzić kamień do piekarnika i rozgrzać go.
Umyć szpinak i udusić go na patelni na odrobinie masła lub oliwy do momentu aż zmięknie.
Ciasto podzielić na dwie części , rozciągać lub rozwałkować, aż będzie odpowiednio cienkie. Wyjąć kamień z piekarnika, uważając by się nie poparzyć postawić go na metalowej kratce. Nałożyć rozwałkowane ciasto i uformować brzeg.
Na pizzy rozprowadzić połowę sosu pomidorowego, ułożyć połowę szpinaku, szynki parmeńskiej, posypać pokruszoną Gorgonzolą, orzechami i ewentualnie ulubionymi ziołami
Piec około 20 minut w 200-220C. Przed podaniem skropić oliwką. Pokroić na 6-8 kawałków.

Smacznego!!!


Thursday, October 27, 2011

Super easy tart with pears, blue cheese and thyme / Super prosta tarta z gruszkami, serem pleśniowym i tymiankiem

Very fast and easy way to prepare delicious semi-sweet tart.
  • 1 package of ready made french pastry (approximately A4 size);
  • 2-3 pears;
  • 100g of blue cheese;
  • thyme (fresh or dried);
  • balsamic vinegar glaza for serving.
Cut the pastry into half, line the baking tray with baking parchment. Place the pastry on the baking tray keep few cm distance. Cut the pears vertically into halves, remove seeds, slice very thinly and place on the pastry so that the slices are overlapping each other. Break the blue cheese with your fingers, sprinkle from top. Season with thyme. 
Bake for approximately 25minutes in 200C till the pastry is golden in colour. Serve with balsamic vinegar glaze.
 
Yum Yum Yum :)
-------------------------------------------------------------------------------------------------------------- 
Bardzo szybki i prosty sposób na pyszną półsłodką tartę.
  • 1 opakowanie ciasta francuskiego (mniej więcej rozmiaru A4);
  • 2-3 gruszki;
  • 100g sera pleśniowego (z niebieską pleśnią);
  • tymianek (świeży lub suszony);
  • zredukowany ocet balsamiczny do podawania.
Przeciąć ciasto na pół. Blachę do pieczenia wyłożyć papierem do wypieków, ułożyć na niej dwa kawałki ciasta zachowując odstęp kilku cm. Gruszki przeciąć wzdłuż na pół, wyciąć gniazdo nasienne. Pokroić na cienkie półplasterki, ułożyć je na cieście tak by jeden zachodził na drugi. Ser pleśniowy pokruszyć palcami i posypać nim tartę, przyprawić tymiankiem. Piec około 25min w 200C do momentu, aż ciasto będzie złociste. Podawać z gęstym lub zredukowanym octem balsamicznym.

Smacznego :)


Wednesday, October 19, 2011

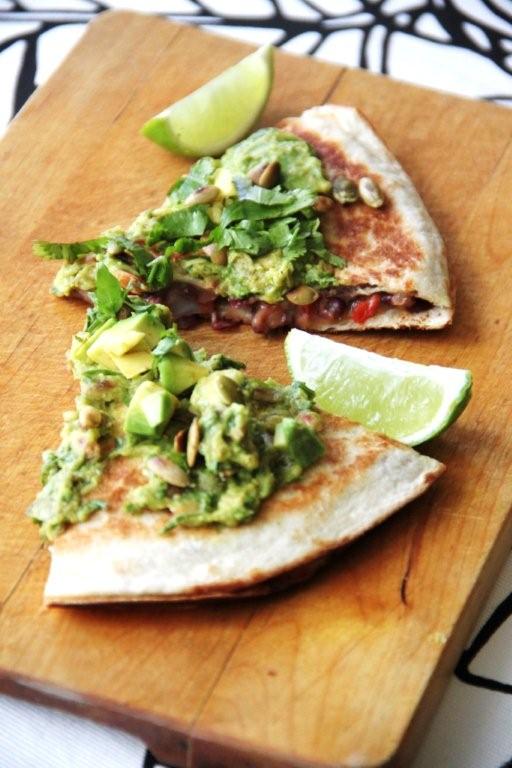
Spicy black bean quesadilla/Pikantna quesadilla z czarną fasolą

As seen on TV...

Top chefs Allegra McEvedy and Paul Merrett have devised Economy Gastronomy, a system to slash our food bills and eat better than we've ever done before. The Economy Gastronomy system shows every household in Britain how to save time and money and still create amazing, flavour-packed meals on a budget.
So eat better and spend less.

Ingredients for 2 servings:
  • 400g can of red kidney beans drained, rinsed;
  • ½ tsp of cumin powder;
  • ½ tsp of dried oregano or winter savory;
  • 1 tsp of chili flakes, you can add some more if you like your food spicy;
  • 1 red onion;
  • 1 red capsicum;
  • 100g of grated cheddar cheese;
  • salt and freshly ground black pepper to taste;
  • 4 pcs of ready made tortillas;
  • 2 garlic cloves, peeled, cut in half;
  • 2 tbsp oil;
  • handful coriander leaves, washed, chopped, plus extra to serve;
  • 1 ripe avocado, peeled, stone removed, chopped, plus extra to serve;
  • juice of 1 fresh lime;
  • 3 tbsp of pumpkin seeds.
In a bowl, mix together the beans, cumin, oregano, dried chili flakes, chopped red onion, chopped capsicum and grated cheese until well combined, using your hands to squash the beans. Season, to taste, with salt and freshly ground black pepper.
Lay the tortillas out on a clean work surface. Rub the cut sides of the garlic clove vigorously all over the tortillas. Divide the bean mixture between two of the tortillas, spreading the mixture out using a spoon to completely cover the tortillas. Place the remaining two tortillas on top of the mixture, making sure the sides you rubbed with garlic are facing inwards. Gently press down to form two sandwiches.
Heat half of the oil in a large frying pan over a medium heat. Add one of the quesadillas to the pan and fry for 3-4 minutes on each side, pressing the quesadillas down from time to time using a spatula, until the tortillas are crisp and golden-brown on both sides and the filling has melted. Remove from the pan carefully and set aside to drain on kitchen paper. Keep warm. Repeat the process with the remaining oil and the second quesadilla.
Meanwhile, in a small bowl, mix together the coriander, avocado, lime juice and a pinch of salt until well combined. Set aside.
When the quesadillas are cooked, add the pumpkin seeds to the pan they were cooked in. Fry for 1-2 minutes, or until golden-brown, then add them to the coriander and avocado mixture.
To serve, slice each quesadilla into six pieces and divide the slices between two serving plates. Scatter over the remaining coriander leaves, chopped avocado and roasted pumpkin seeds.
 ------------------------------------------------------------------------------------------------------------
Jakiś czas temu miałam okazję oglądać na Kuchnia.TV program zatytułowany Ekonomia Gastronomia.

Szefowie kuchni Allegra McEvedy oraz Paul Merrett stworzyli program oszczędzania  na wydatkach na żywność pod wdzięczną nazwą Ekonomia Gastronomia. System analizuje wydatki na żywność danej rodziny, a następnie proponuje inne, tańsze a zarazem smaczniejsze rozwiązania jak wyżywić rodzinę. 
Co prawda metoda ta została zaprojektowana by odpowiadać Brytyjczykom, ich gustom kulinarnym i możliwościom finansowym i nie da się w prosty sposób przełożyć na rynek polski, niemniej jednak zaciekawił mnie jeden z prezentowanych tam przepisów i dzisiaj pragnę się nim podzielić.


Składniki na 2 porcje:
  • 1 puszka (400 g) czarnej fasoli, odsączonej i przepłukanej;
  • ½ łyżeczki mielonego kminu;
  • ½ łyżeczki suszonego oregano;
  • 1 łyżeczka suszonych płatków chili;
  • 2 dymki, przycięte i pokrojone na plasterki;
  • 1 czerwona papryka, pokrojona w kostkę o boku 1 cm;
  • 80 g tartego cheddara;
  • sól i świeżo mielony pieprz;
  • 4 gotowe miękkie tortille pszenne lub kukurydziane;
  • 1 ząbek czosnku, obrany i przekrojony na pół;
  • 2 łyżki oleju roślinnego;
  • pęczek kolendry, listki umyte i grubo posiekane;
  • 1 dojrzałe awokado,  posiekane;
  • sok z 1 limonki;
  • 1 limonka pokrojona na cząstki, do podania;
  • szczypta soli;
  • 2 łyżki pestek dyni bez łupinek.

Przygotowanie:
Wymieszaj w misce fasolę, kmin, oregano, suszone płatki chili, posiekaną dymkę, paprykę i tarty ser. Najlepiej zrobić to rękami, częściowo miażdżąc fasolę. Dopraw do smaku solą i mielonym pieprzem. Rozłóż tortille na czystym blacie i natrzyj je czosnkiem. Rozłóż fasolową mieszaninę na 2 tortillach aż po brzegi. Przykryj je pozostałymi dwoma plackami, natartą czosnkiem powierzchnią w dół. Rozgrzej połowę oleju na patelni i usmaż pierwszą quesadillę po 3-4 min z każdej strony, aż tortille będą złociste, a ser w środku się stopi. Połóż quesadillę na kawałku papierowego ręcznika, żeby wchłonął nadmiar tłuszczu. Powtórz czynności z drugą quesadillą. W tym czasie wymieszaj w misce kolendrę, awokado, sok z limonki i szczyptę soli. Kiedy zdejmiesz drugą quesadillę z patelni, upraż na pozostałym oleju pestki dyni i dodaj je do sałatki z awokado. Pokrój obie quesadille na 6 kawałków i rozłóż na talerzach. Na wierzch nałóż sałatkę z awokado i podawaj z cząstkami limonki.


Friday, September 23, 2011

Spaghetti al tonno/Spaghetti z tuńczykiem

Another ultra fast proposal for a yummy lunch or supper.
I am not sure if this dish can be considered tasty by my Indian friends, as tuna in such version is rather a controversial combination, but Europeans love it. If you are among tuna lovers enjoy your meal and if you aren't, please choose some different recipe... preferably mine ;)

for 3-4 servings:
  • 300g of dry spaghetti;
  • 2 cans of tuna in oil;
  • 2 onions;
  • 4 cloves of garlic;
  • 200ml of cream;
  • 2 spoons of fresh grated Parmesan + some extra for serving;
  • fresh grounded black pepper;
  • salt;
  • chopped parsley leaves.
Cook pasta al dente. 
Open tuna cans, pour the oil from the can on a deep pan, heat it and saute chopped onions and sliced garlic.
After a while add tuna and braise for a while. Reduce heat, stir in the cream, season with salt, pepper, 2 spoons of  grated Parmesan and some chopped parsley. Mix well.
Add cooked pasta, combine together, serve with some grated Parmesan, fresh grounded black pepper and parsley leaves.

Buon Appetito!!!
--------------------------------------------------------------------------------------------------------------
Kolejna propozycja na ultra szybki lunch lub kolację. Dla moich hinduskich przyjaciół, taki sposób na tuńczyka jest dość kontrowersyjny. Tak więc jeśli uwielbiasz tuńczyka życzę Ci smacznego, a jeśli za nim nie przepadasz, wybierz proszę inny przepis... najlepiej spośród moich ;)

składniki na 3-4 porcje:
  • 300g makaronu spaghetti;
  • 2 puszki tuńczyka w oleju;
  • 2 cebule;
  • 4 ząbki czosnku;
  • 200ml śmietanki;
  • 2 łyżki świeżo tartego parmezanu + dodatkowo do serwowania;
  • świeżo mielony czarny pieprz;
  • sól;
  • posiekana natka pietruszki.
Makaron ugotować al dente.
Otworzyć puszki z tuńczykiem, zawarty w nich olej wlać na głęboką patelnię, rozgrzać, dodać posiekaną cebulę i czosnek, zeszklić. Po chwili dodać tuńczyka wszystko razem przez chwilę poddusić.
Zmniejszyć gaz, wmieszać śmietankę, doprawić solą, pieprzem, 2 łyżkami parmezanu i częścią natki. Dokładnie wymieszać. Dodać makaron i połączyć go dokładnie z sosem. Podawać posypane parmezanem, świeżo mielonym czarnym pieprzem i posiekaną natką pietruszki.

Smacznego!!!


Tuesday, September 13, 2011

Fettuccine con panna e salmone/ Fettuccine w sosie śmietanowym z łososiem

Today I'd like to share a recipe which is one of the easiest one can imagine. Simple, fast and a delicious idea for quick lunch or supper.

3-4 servings
  • approx. 350g of fettuccine, pappardelle or tagliatelle;
  • 250g of smoked salmon, cut into small pieces;
  • 250ml of full cream (30% fat);
  • 3 teaspoons of tomato paste;
  • bunch of chives;
  • freshly ground black pepper;
  • cherry tomatoes for decoration.
Cook pasta al dente. Strain it.
In a pan heat up the cream. It should thicken with heat. Add tomato paste and combine it with cream using a whisk. Add salmon, cook for about 5 minutes. Season with freshly ground black pepper. Salt is not required as salmon itself gives saltiness to this dish. Just before serving add one bunch of chopped chives.
Combine the sauce with pasta, mix well. Serve with cherry tomatoes.

If you are calorie conscious you can use the cream with lower fat content.

Buon Appetito!!!

-------------------------------------------------------------------------------------------------------------
Dzisiaj chciałabym się podzielić chyba najprostszym przepisem na makaron, który posiadam w swoim repertuarze. Prosty, szybki i pyszny sposób na wyborny lunch lub kolację.

3-4 porcje
  • około 350g of fettuccine, pappardelle lub tagliatelle;
  • 250g wędzonego łososia, pokrojonego na małe kawałki
  • 250ml śmietany kremówki (30% tłuszczu);
  • 3 łyżeczki przecieru pomidorowego;
  • pęczek szczypiorku;
  • świeżo mielony czarny pieprz;
  • pomidorki koktajlowe do dekoracji.

Makaron ugotować al dente, odsączyć. Na patelni podgrzewać śmietanę do momentu, aż zacznie gęstnieć.
Dodać przecier pomidorowy, połączyć ze śmietaną za pomocą rózgi. Następnie dodać łososia, dusić przez około 5 minut. Przyprawić świeżo mielonym czarnym pieprzem. Sól nie jest konieczna, gdyż łosoś sam w sobie czyni potrawę odpowiednio słoną. Przed podaniem dodać pęczek posiekanego szczypiorku.
Sos wymieszać z makaronem, serwować z pomidorkami koktajlowymi.

Osoby dbające o linię mogą użyć mniej tłustej śmietany.

Buon Appetito!!!


Monday, August 15, 2011

Grilled chicken steak with hot mango salsa/Grillowany stek z kurczaka z salsą z mango na ciepło

As the mango season is coming to an end I'd like to share another recipe with this king of fruit as an ingredient.

Enjoy!
Ingredients:
  • chicken breast 1 pc per person;
  • salt&pepper to taste;
  • little bit of olive oil.
For Mango Salsa:
  • 1 big mango;
  • 1 tomato;
  • 1 red chili;
  • 1 red onion;
  • two spoons of chopped coriander;
  • juice of 1/2 lime;
  • salt&pepper to taste;
  • cumin powder to taste;
  • optionally pomegranate seeds;
  • 1 tea spoon of olive oil.
Method: 
Season chicken breasts with salt and pepper, keep aside.
Preheat the grill or grilling pan, apply a bit of oil and grill the chicken till the time it is well done.

To make the mango salsa chop all the vegetables and mix them together. Season with salt, pepper, cumin powder and lime juice. Add oil, mi well and cook on a slow flame for about 3-5 minutes.
Serve the grilled chicken with the mango salsa on top.
Bon Appetit!!!

recipe inspired by: The crazy chef
--------------------------------------------------------------------------------------------------------------
Sezon na mango powoli dobiega końca, niemniej jednak chciałabym się podzielić kolejnym przepisem z "owocowym królem" w roli głównej. 

składniki:
  • piersi z kurczaka po 1 szt. na osobę;
  • sól i pieprz do smaku;
  • odrobina oliwy z oliwek.
Na salsę z mango:
  • 1 duże mango;
  • 1 pomidor;
  • 1 czerwona papryczka chili;
  • 1 czerwona cebula;
  • 2 łyżki siekanej kolendry;
  • sok z 1/2 limonki;
  • sól i pieprz do smaku;
  • mielony kumin do smaku;
  • opcjonalnie pestki granata;
  • 1 łyżeczka oliwy z oliwek.
Sposób przygotowania: 
Kurczaka doprawić solą i pieprzem, odstawić na chwilę. Rozgrzać grilla lub patelnię grillową  posmarować oliwą i upiec kurczaka.

Aby przygotować salsę z mango, należy posiekać wszystkie składniki, doprawić je solą, pieprzem, kuminem i sokiem z limonki. Dodać oliwę i wszystko dokładnie połączyć ze sobą. Dusić przez około 3-5 minut.
Salsę podawać na gorąco na piersiach z kurczaka.
Smacznego!!!